DIY Sound Panels - Build Your Own for Cheap!
Acoustic Panels
Build your own sound panels
DIY
DIY Project Guides
Sound Panels
Sound Proofing
Tips & Advice
Tutorials
Gear Focus
Jun 12, 2020

Don't spend a fortune on sound panels for soundproofing your studio space! You can easily put together some DIY sound panels that are custom-sized for your needs. In this episode of our DIY series Matt shows a quick and easy way to put together your own panels at a fraction of the cost. Best of all you can customize the sizes to fit your exact space needs.
https://youtu.be/97rEz11PjV8
Measure the boards for the appropriate length that you'll need to make your panels. For this project, we cut two 25.5" boards and two 48" boards. Mark the boards and then use your saw to cut them to size. Cut all 4 boards for your DIY sound panels for the top, bottom, and sides.
 Now that you have the boards all cut to the appropriate size, you can whip out your Kreg drill and bits. Determine the appropriate length for the screws and set your Kreg bit to that. (Follow the instructions that come with your set for exact settings). Since these are 4" boards, we like to slide the jig over and set the pocket holes slightly apart. Once the pocket holes are ready, butt the side board up and use the included drill bit to drive the screws through for a nice tight fit. Repeat for all sides until you have the rectangular frame complete.


 For our size, the acoustic panel fit perfectly in the frame. If your DIY sound panel is a different size, just cut it down to whichever size you need. You can then add some boards (especially if you have extra scrap pieces!) to the back of the panel to secure the acoustic material. Now is the perfect time to clean up your mess! This is the last step with sawdust and debris.


 The last step is adding the fabric to the panels. We recommend doing this step on carpet. Lay your DIY sound panels upside down on top of the fabric and pull it taut. It is best to pull the fabric over the sides, cut it, and staple it to the frame first. Once both sides are done, you can begin on the top and bottom. You'll probably want to cut a notch out of the corners of the fabric so that it pulls nicely over the frame.


DIY Sound Panels
This is a fairly straightforward DIY project that most users will be able to put together in an afternoon. Best of all, these sound panels are cheap! Most of the tools used in the video you may already own, but even without some of the tools you should have no problem assembling the panels. Not only are they great for dampening sound, but they look great too!Recommended Building Materials
- boards
- Kreg Pocket-Hole Jig
- Kreg Screws
- Rockwool Acoustic Panels 2ft x 4ft (6 Pack)
- Acoustical Fabric
- Dewalt Clamp
- Staple Gun
Step 1: Measure and Cut Down Your Boards
Measure the boards for the appropriate length that you'll need to make your panels. For this project, we cut two 25.5" boards and two 48" boards. Mark the boards and then use your saw to cut them to size. Cut all 4 boards for your DIY sound panels for the top, bottom, and sides.
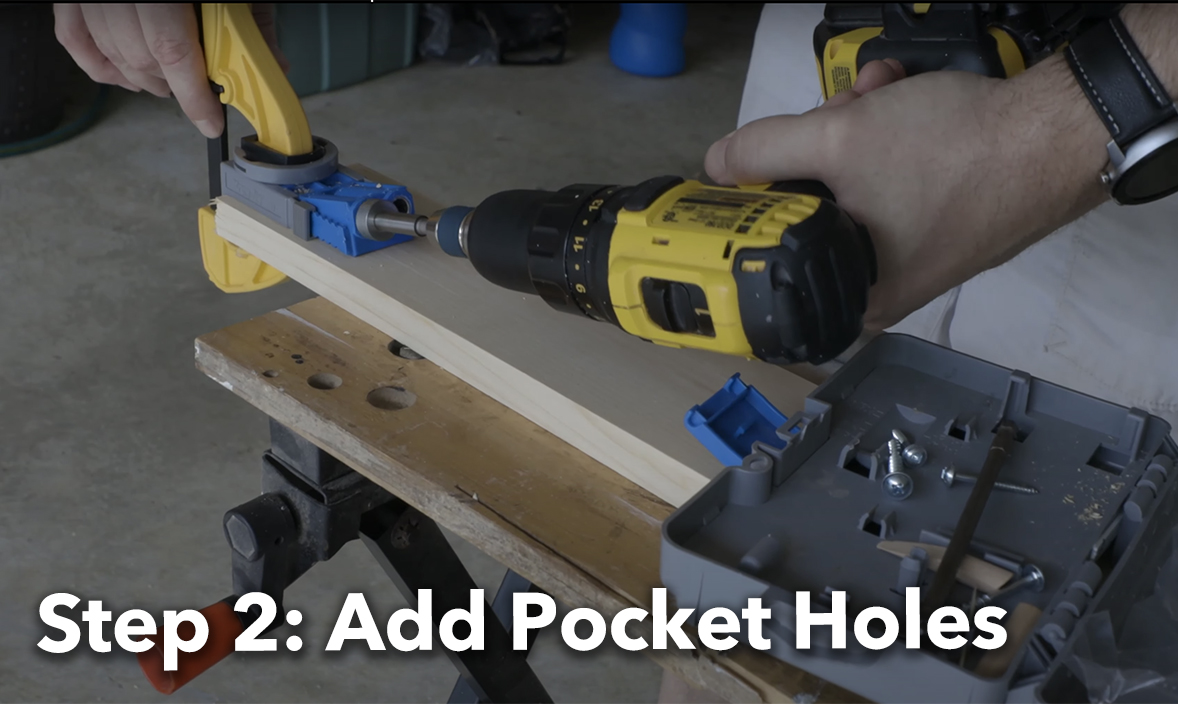
Step 2: Add the Pocket Holes
Now that you have the boards all cut to the appropriate size, you can whip out your Kreg drill and bits. Determine the appropriate length for the screws and set your Kreg bit to that. (Follow the instructions that come with your set for exact settings). Since these are 4" boards, we like to slide the jig over and set the pocket holes slightly apart. Once the pocket holes are ready, butt the side board up and use the included drill bit to drive the screws through for a nice tight fit. Repeat for all sides until you have the rectangular frame complete.


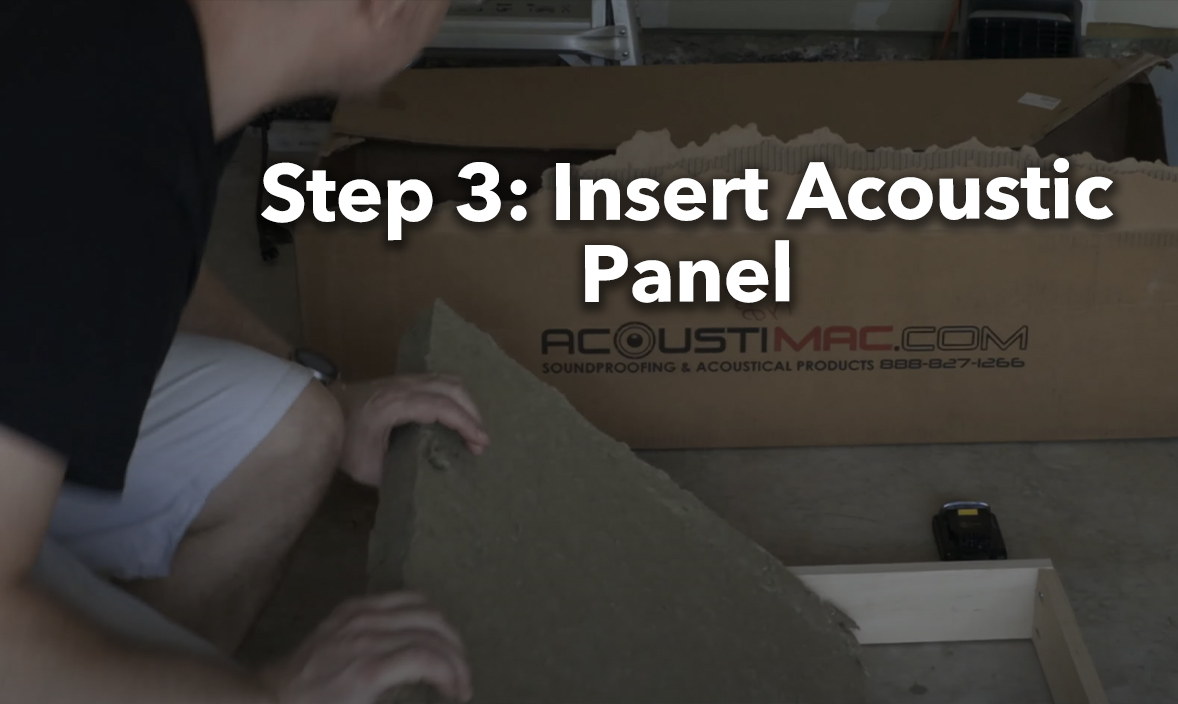
Step 3: Insert the Acoustic Panels
For our size, the acoustic panel fit perfectly in the frame. If your DIY sound panel is a different size, just cut it down to whichever size you need. You can then add some boards (especially if you have extra scrap pieces!) to the back of the panel to secure the acoustic material. Now is the perfect time to clean up your mess! This is the last step with sawdust and debris.

Step 4: Add the Fabric Over the Front of Your DIY Sound Panels
The last step is adding the fabric to the panels. We recommend doing this step on carpet. Lay your DIY sound panels upside down on top of the fabric and pull it taut. It is best to pull the fabric over the sides, cut it, and staple it to the frame first. Once both sides are done, you can begin on the top and bottom. You'll probably want to cut a notch out of the corners of the fabric so that it pulls nicely over the frame.

Now Hang Your New Panels!
Now that you've assembled the panels, hang them up on the wall or even on the ceiling. They work great since they leave enough space for sound to penetrate through, bounce off the wall, and then get further dampened on the way back out of the acoustic material. Let us know if you have success putting together your DIY sound panels in the comments below. And of course, let us know if you have any questions regarding any of these steps. Contact Us to let us know what DIY project you think we should take on next!Own one like this?
Make room for new gear in minutes.
Loading...