6 Tips for Becoming a Better Macro Photographer
Macro Photography
Photography
Tips & Advice
Tutorials
Gear Focus
Apr 21, 2021
Being a macro photographer means being committed to and passionate about the unseen face of the world. It means you can find beauty in the smallest details of any type of subject matter. Macro photography allows you to photograph small subjects such as insects, flowers, and droplets but also small parts of larger subjects such as a human iris, a clock mechanism, and the surface of a rock. The only rule is to achieve a 1:1 magnification ratio or higher.
[caption id="attachment_2885" align="alignnone" width="2000"] Photo Credit: Peter Dam[/caption]
But although you have plenty of subjects and many of them are easily accessible, as a macro photographer you face two major challenges. The first one is choosing a subject that will interest you and your audience. The second one is to photograph the subject appealingly and artfully. There is also a third challenge, which you face with any photographic genre: finding your voice as a photographer and delivering unique photographs.
We’ve gathered here the most valuable tips to help you become a storyteller and develop compositional and technical skills for macro photography. The rest is up to you.
[caption id="attachment_2886" align="alignnone" width="2000"]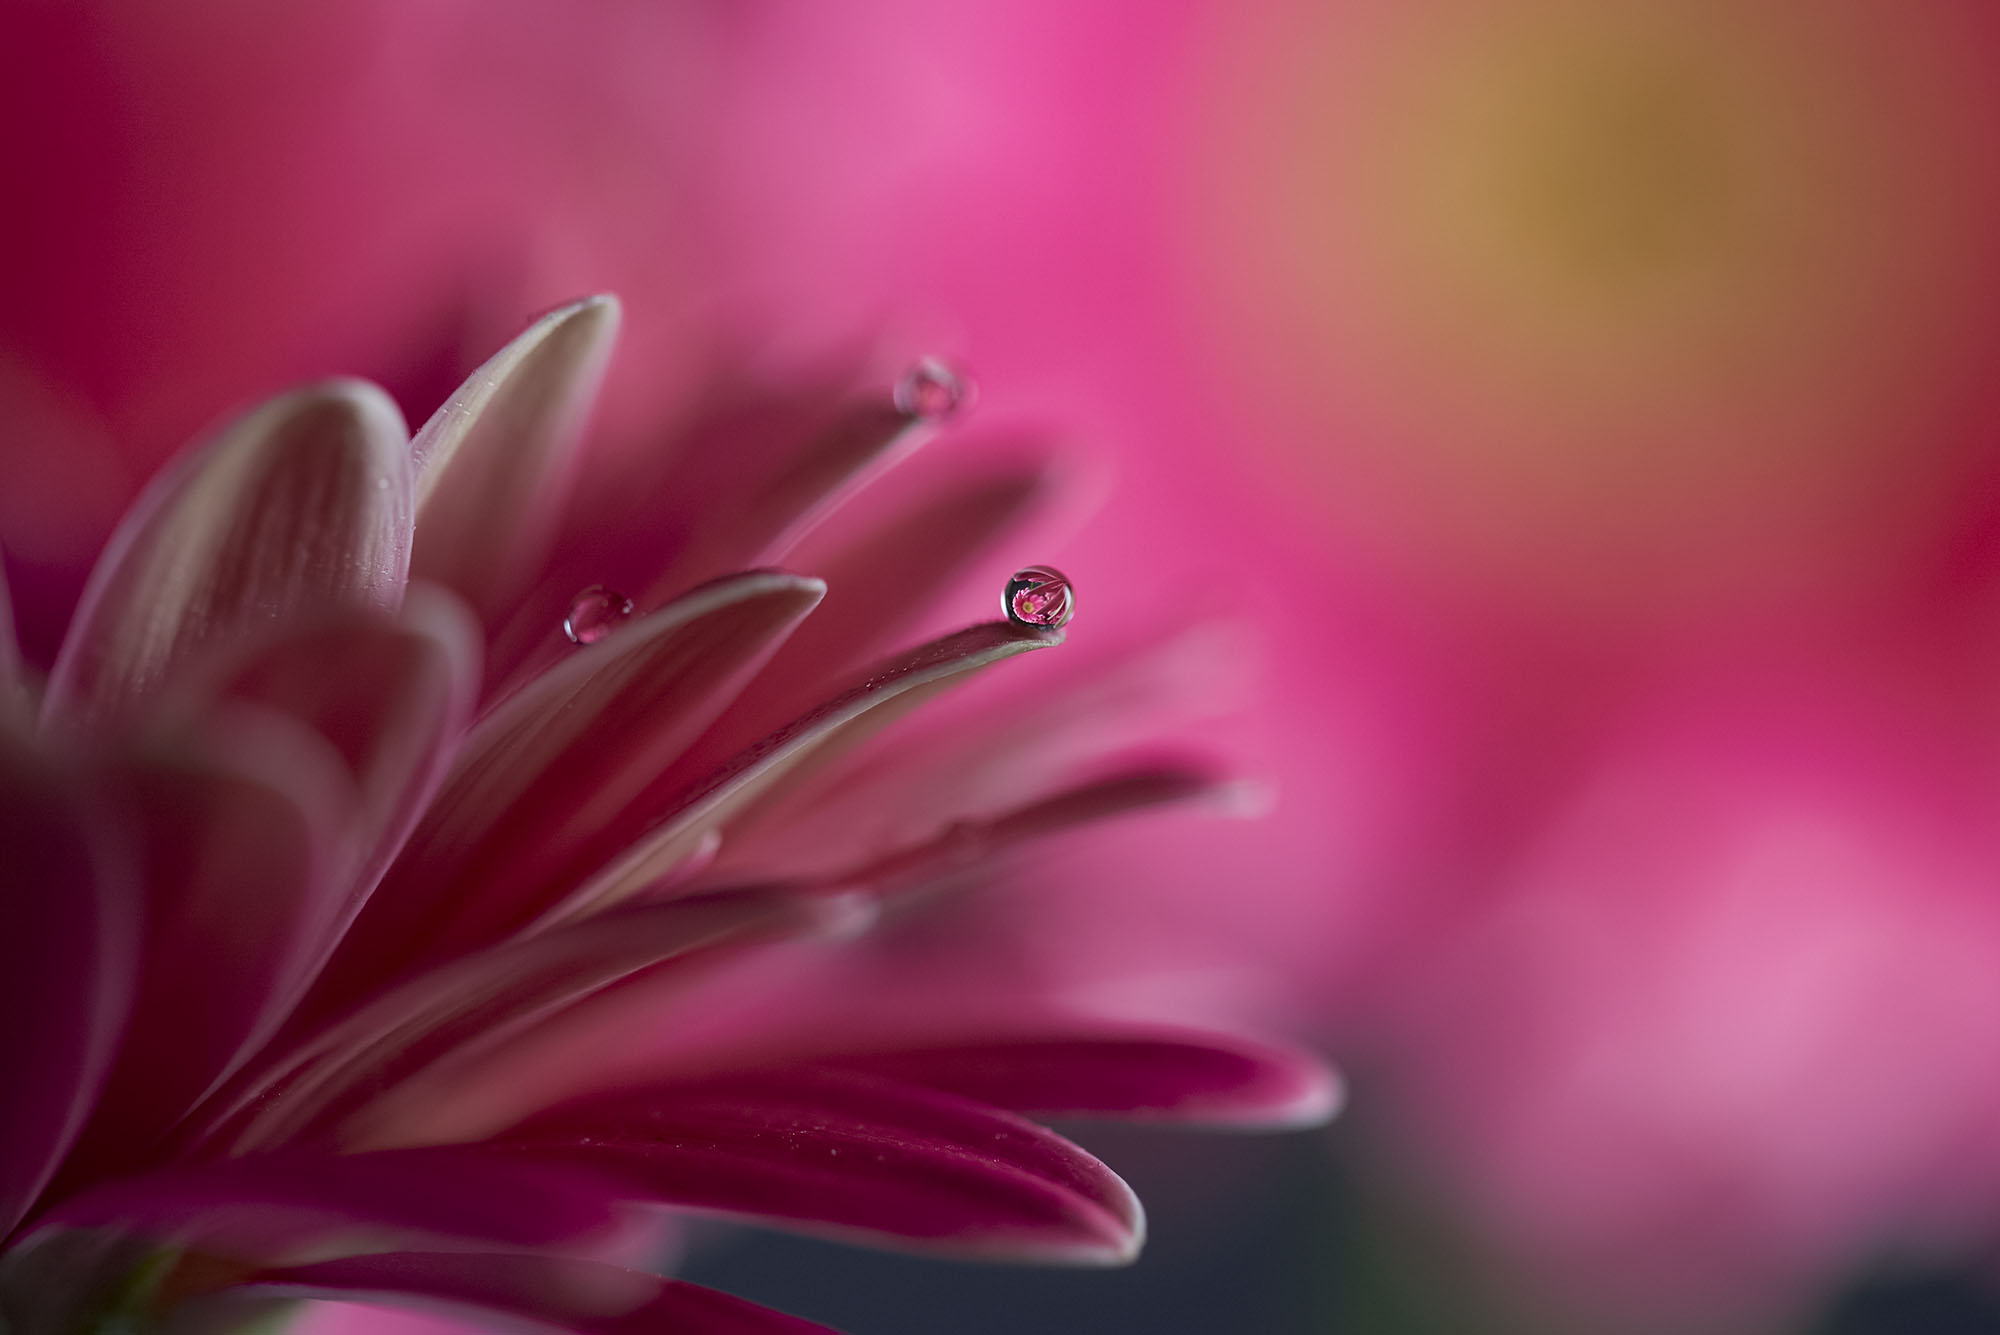 Photo Credit: Peter Dam[/caption]
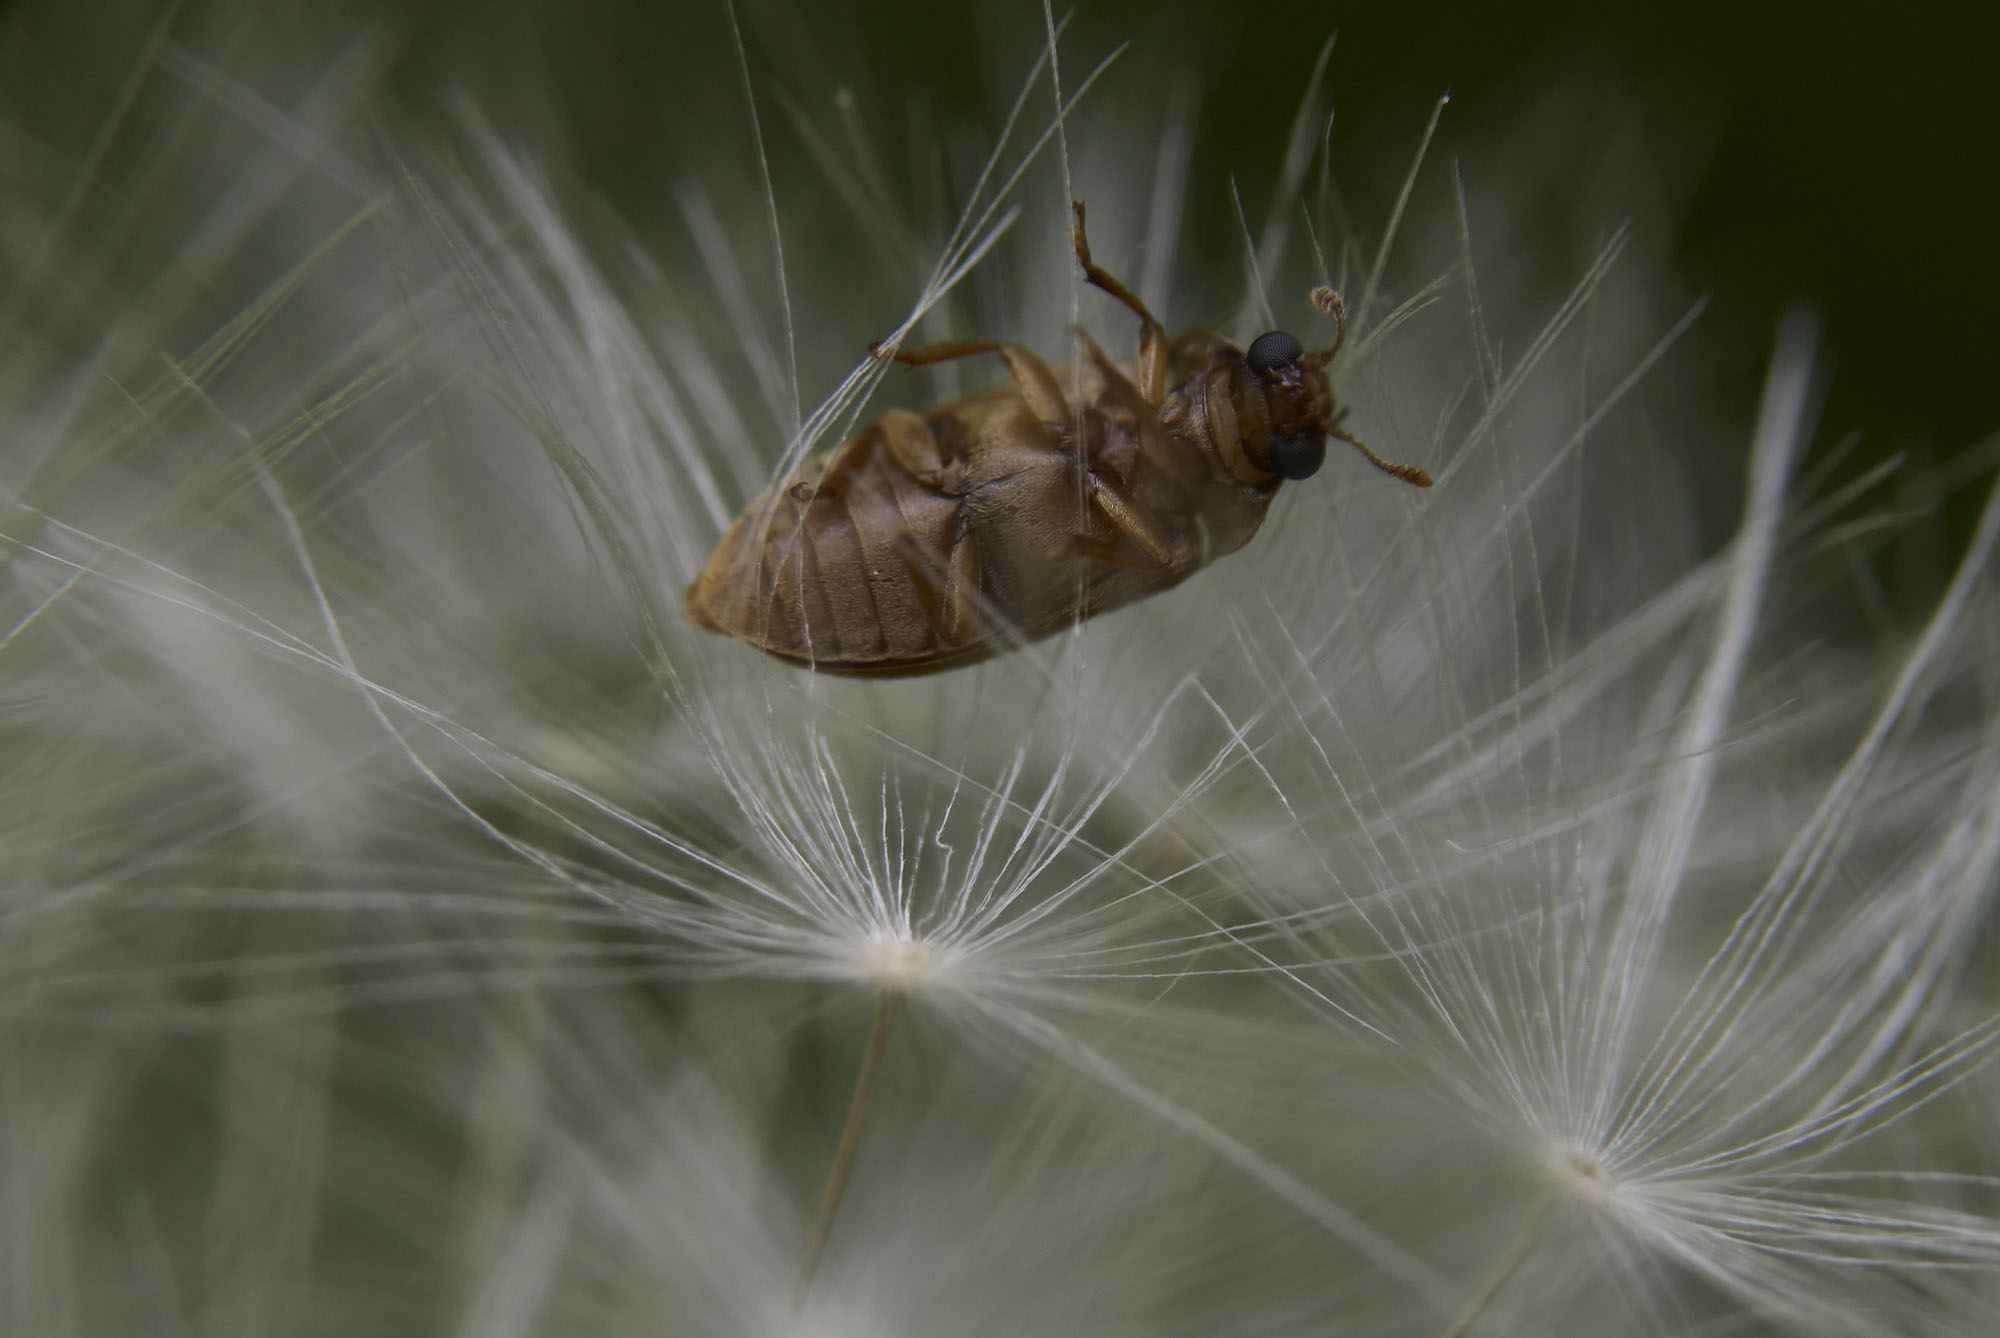 Photo Credit: Peter Dam[/caption]
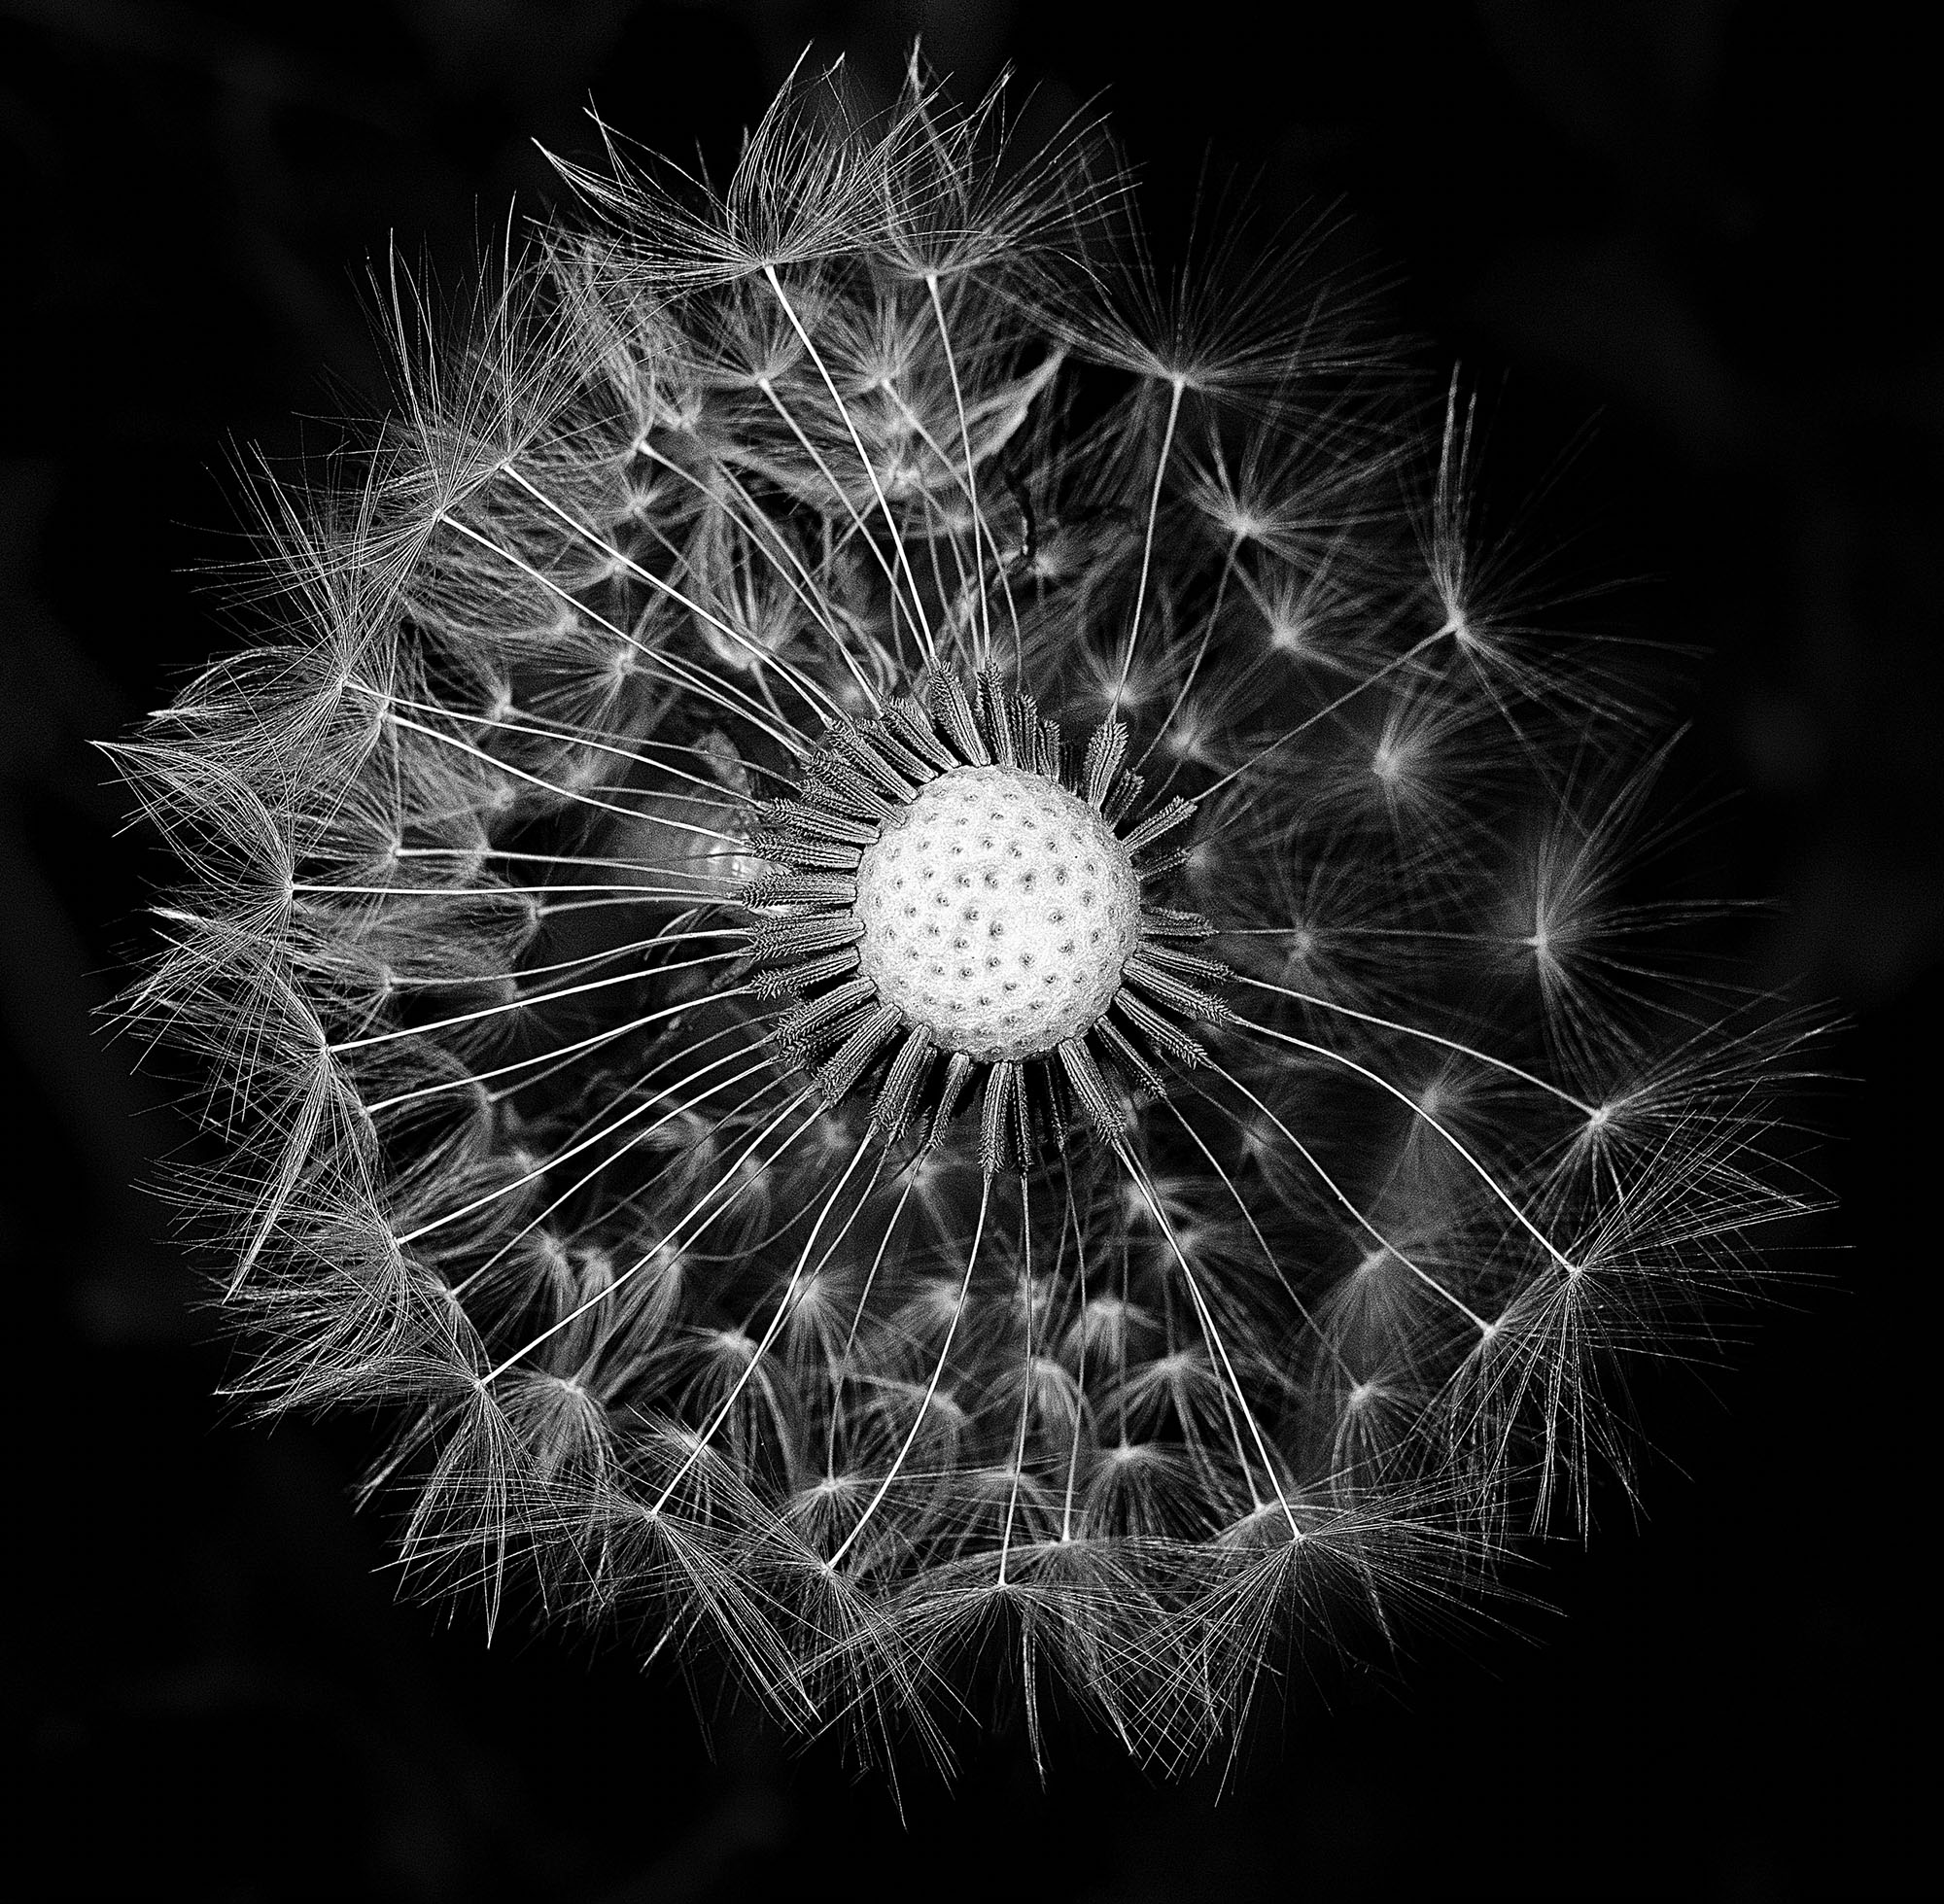 Photo Credit: Peter Dam[/caption]
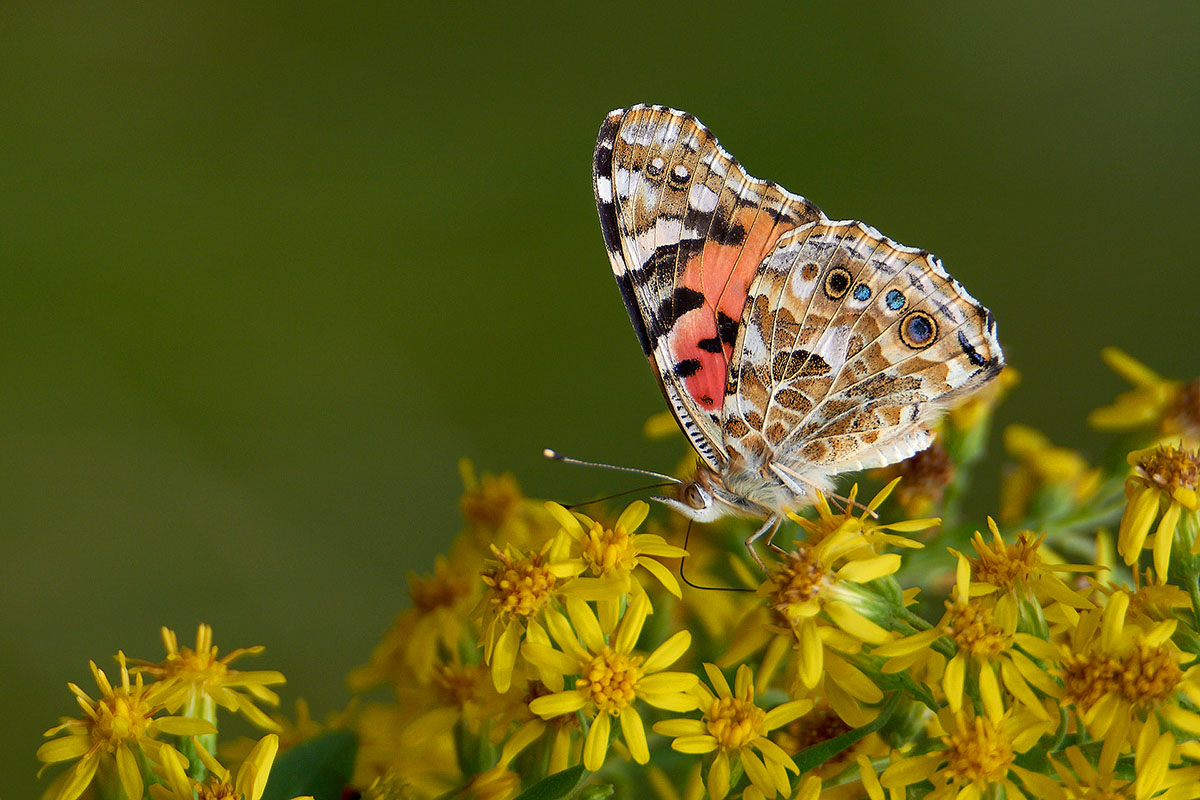 Photo Credit: Peter Dam[/caption]
 Peter Dam is a Nature Photographer and the owner of Photography-RAW. A growing photography blog, where you can find tutorials, free photography ebooks. Peter writes about everything from macro photography to finding the most suitable photo editor.
Photo Credit: Peter Dam[/caption]
But although you have plenty of subjects and many of them are easily accessible, as a macro photographer you face two major challenges. The first one is choosing a subject that will interest you and your audience. The second one is to photograph the subject appealingly and artfully. There is also a third challenge, which you face with any photographic genre: finding your voice as a photographer and delivering unique photographs.
We’ve gathered here the most valuable tips to help you become a storyteller and develop compositional and technical skills for macro photography. The rest is up to you.
[caption id="attachment_2886" align="alignnone" width="2000"] Photo Credit: Peter Dam[/caption]
Practice the art of seeing
The first thing any photographer has to learn is to see the world as a photograph. This is especially difficult for macro photographers because their subject matter is usually very small and well hidden. As Freeman Patterson teaches his students, you can practice specific methods to learn to observe, select, abstract, and imagine the scene you see as a framed picture. The good news is that you can practice anywhere you are. Pay attention to the world around you and decompose each scene you see into smaller and smaller pieces. Instead of focusing on the big picture, focus on the details. You’ll be the one who can’t see the forest for the trees, can’t see the tree for the leaves, and can’t see the leaf for its texture and veins. It helps to slow down and take time to contemplate. It also helps to get close to potential subjects, have patience, and keep an open mind.Take time to do research
When you find a large category of subjects that you feel could work for you, it’s time for research. Especially if you choose subjects from a natural environment, you should study their ecosystem and understand their life cycle. For example, macro photographers specialized in photographing insects may need to learn where to find those insects, when is their breeding season, how they behave during the day, how shy they are, and so on. Macro photographers specialized in photographing flowers may need to know the blossoming season and if they look better in the morning or the evening. If you choose to photograph protected species, you can join group trips organized by experts. Even for inanimate subject matters, there are many particular details you can find through research. For example, how the material they are made of reacts to light. The human iris definitely doesn’t react well to flash. Clock mechanisms may also produce glares when using flash. Droplets can create reflections, which you may want to avoid or use in your favor. Snowflakes melt at a specific temperature. In order to take amazing macro photographs, you need to be prepared.Photograph your subject from its eye level
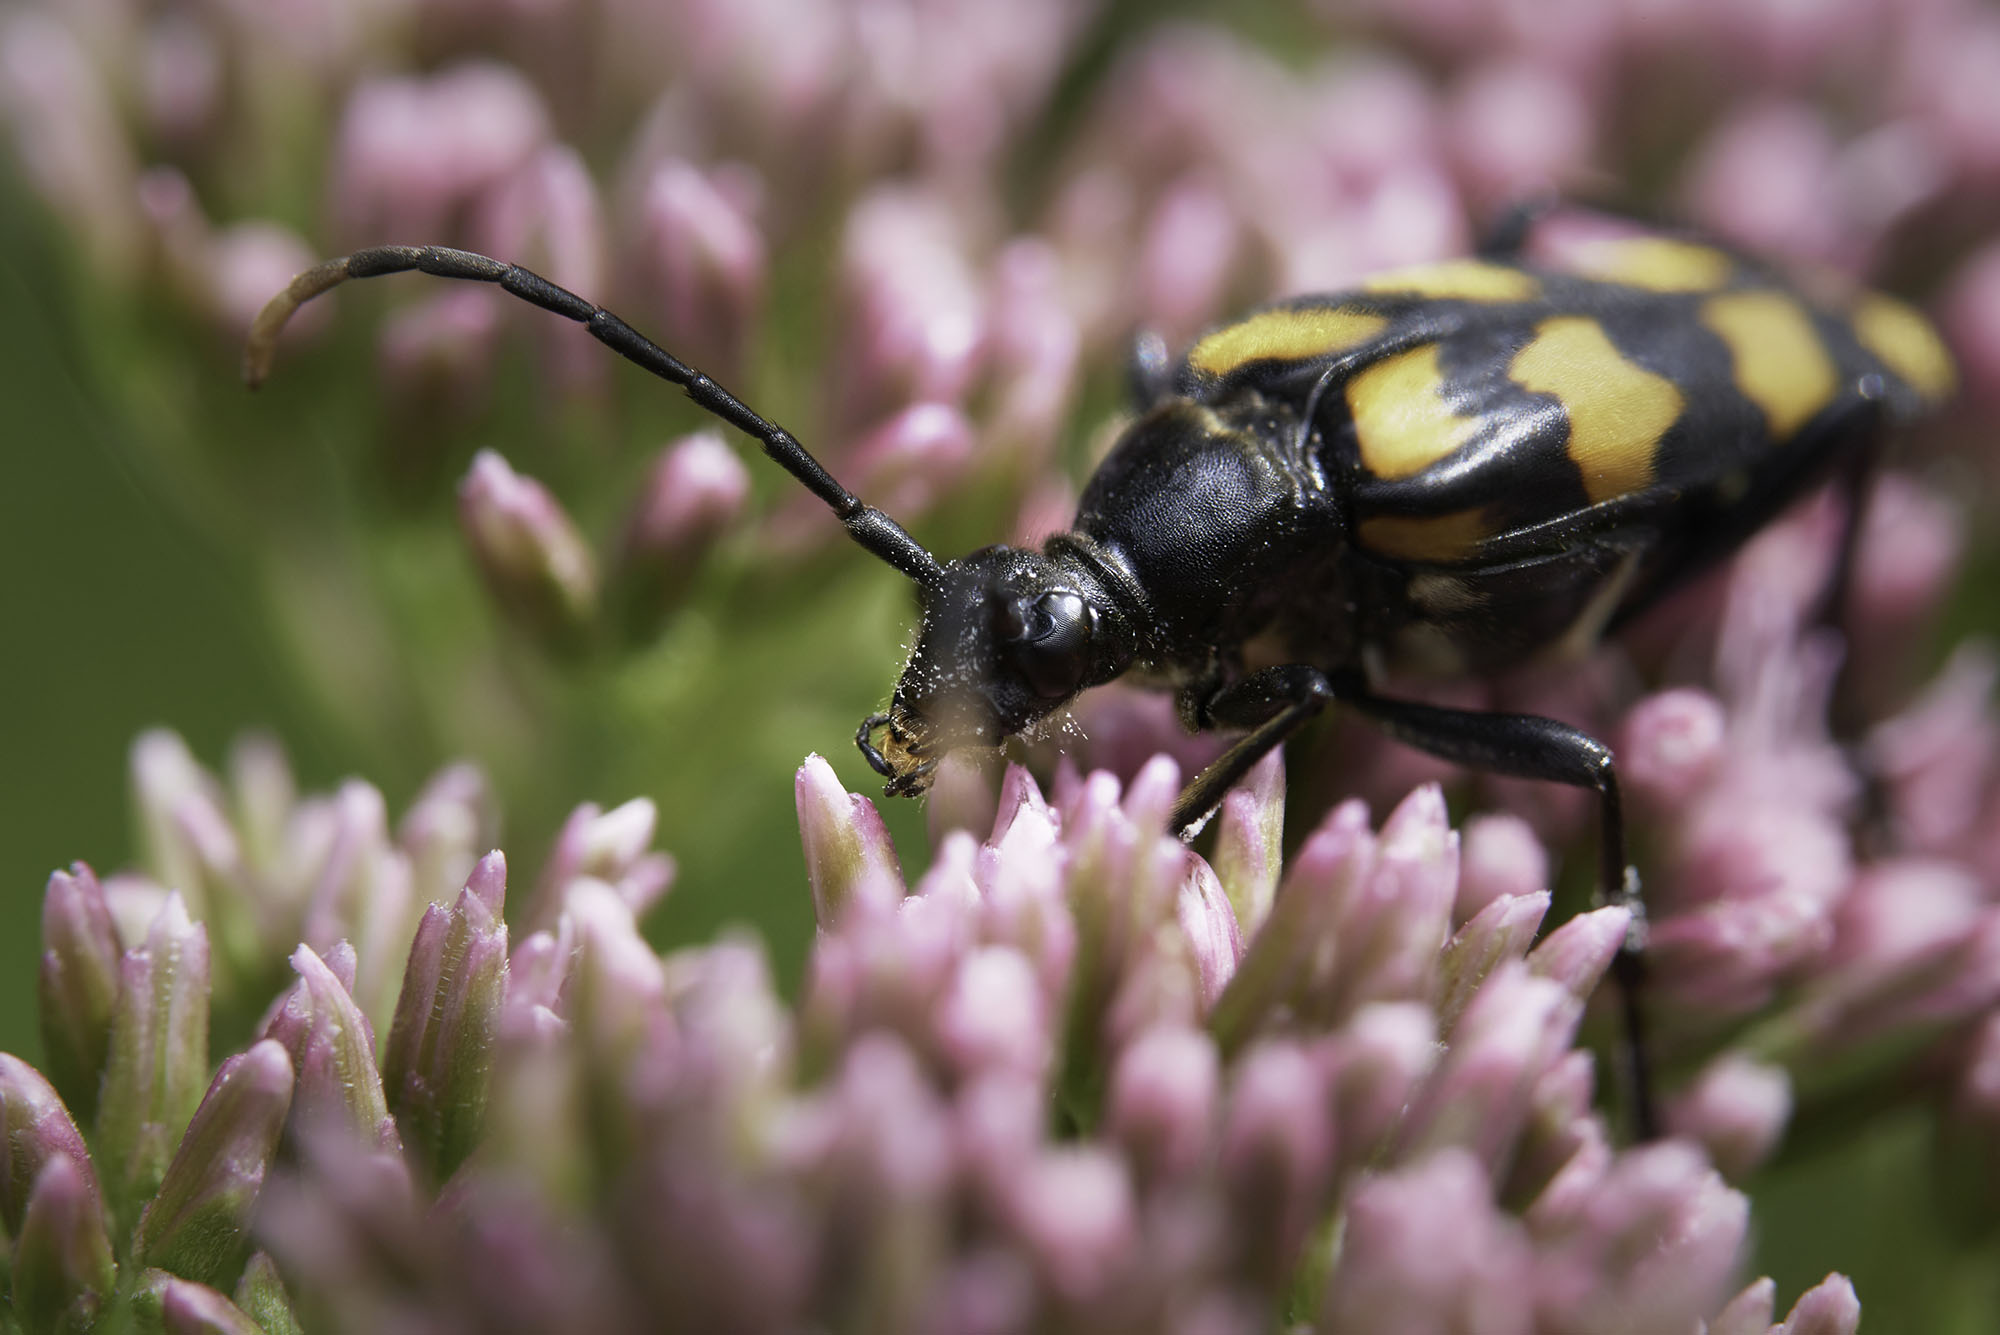
Although your subject is small it deserves the same attention you would give to a person. It is the main character of your visual story; make it stand out and impress the audience. This means you should tell the story from your subject’s perspective. Don’t show your perspective by photographing from your eye level (usually from above the subject). Get to the subject’s level even if this means getting on your knees or lying on the ground. The best macro shots aren’t taken from above but from lateral and sometimes from below. Especially with animated subjects, being parallel with the subject acknowledges their importance and transforms them into a character. Besides, when you’re parallel with the subject you increase the depth of field and the chances to have the entire subject in focus.Use dedicated macro gear
Macro photography is also a technical challenge. You can’t achieve the 1:1 magnification ratio with any lens. Most professional photographers use dedicated macro lenses, which can focus at small distances, provide wide apertures, and come with an Optical Stabilizer. The next best things after macro lenses are the extension tubes. They are hollow tubes that fit between the lens and camera and bring the lens closer to the subject. Extension tubes work with any lens and are less expensive than dedicated macro lenses. You should also consider using a dedicated macro flash such as a ring flash or a twin flash with flexible brackets. Macro photographers prefer external flash because it allows them to place the extra source of light closer to the subject and also choose the direction of the light. Flash adds more light to the scene, allowing you to reduce the aperture and increase the depth of field, increase the shutter speed, or achieve a black background. [caption id="attachment_2887" align="alignnone" width="2000"] Photo Credit: Peter Dam[/caption]
Take pictures with and without a tripod
Using a tripod helps you avoid camera shake and produce sharp images. It also allows you to do focus stacking: taking identical pictures of the same scene, changing just the focus between shots, and increasing the area in focus by overlaying the images in post-processing. Most studio macro photographers use a tripod because their hands are busy holding or triggering external flash units. A tripod is useful. However, don’t use it all the time. A hand-held camera gives you more freedom to take pictures from usual angles and perspectives. You’ll get far more interesting compositions when you hold the camera in your hands. Use flash to eliminate the risk of camera shake blur and experiment. Especially when you take pictures in a natural environment you want light gear and the freedom to adjust to your subject. [caption id="attachment_2888" align="alignnone" width="2000"] Photo Credit: Peter Dam[/caption]
Freeze motion
The major reason for blurred macro images is a moving subject. It may be an insect with its own will or the wind moving a flower. Regardless of the reason behind the movement, you need to act in order to have sharp images with a strong focal point. When you want to freeze motion use a fast shutter speed. Don’t compromise on shutter speed no matter what. If there isn’t enough light in the scene, increase the ISO value or use flash. But don’t use a slow shutter speed when your subject might move. Like with everything else in photography, you need to experiment with different settings until you find the right one for your scene. For example, when you photograph a flower in normal conditions, a shutter speed of 1/400 may be enough. On a windy day, you may have to increase the shutter speed to 1/1000 to have clarity and sharpness. [caption id="attachment_2889" align="alignnone" width="1200"] Photo Credit: Peter Dam[/caption]
Conclusion
You can become a better macro photographer by understanding what motivates you and drags you towards this photographic genre. It’s not an easy one; it requires gear, technical skills, and a lot of patience. All these cost time and money. But when you know exactly what you want to share with the public, why you want to tell these stories, and how to connect with your subject matter, everything becomes possible. The next photo may be the best photo of your portfolio. All you have to do is learn to see the world through a viewfinder. Author Bio:
Peter Dam is a Nature Photographer and the owner of Photography-RAW. A growing photography blog, where you can find tutorials, free photography ebooks. Peter writes about everything from macro photography to finding the most suitable photo editor.Own one like this?
Make room for new gear in minutes.
Loading...